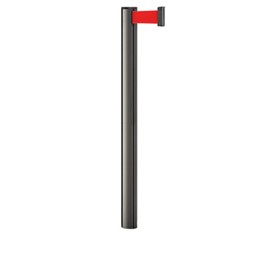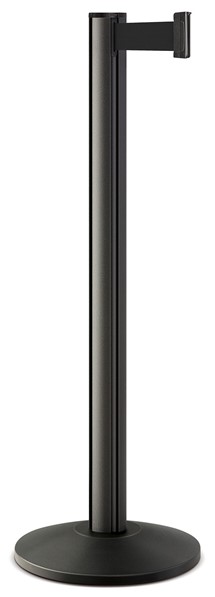

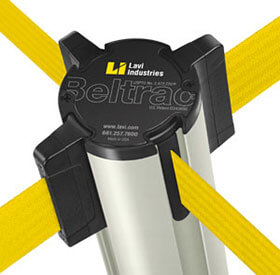
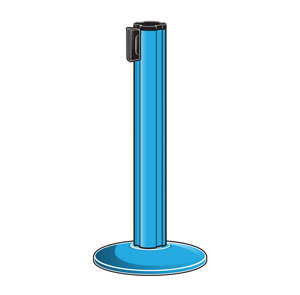
Beltrac 3000 Portable Retractable Belt Stanchion
Finish Setup Fee: |
Belt Setup Fee: |
Aluminum surcharge: $1.84 |
Ships in: 3 Business Days |
204.00


Ships in: 3 Business Days
Finish Setup Fee:
Belt Setup Fee:
You may also be interested in


DESCRIPTION
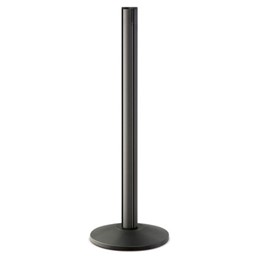
The original grooved-design stanchion remains the most popular. The Beltrac® 3000 retractable belt stanchion is the perfect choice for waiting lines, crowd control, and queue systems. The continuous aluminum extrusion provides superior strength and rigidity to withstand the most extreme environments. The 14” sloped and 14.5" slim base is stylish, yet underneath the surface sits a solid, 18 lb. cast-iron foundation that offers best-in-class stability and longevity. Add to that the original Beltrac 4-way dovetail grooves that allow quick and easy access to in-queue merchandising solutions and you have more than just a retractable belt stanchion — you have a crowd control and queue management system that the world’s largest companies have relied on for decades. But don’t just take our word for it — check out what others say about Lavi and Beltrac.
Beltrac design USPTO® No. 2,472,720.
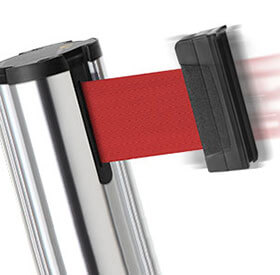
Advanced Retractable Belt Mechanism
- Our viscous damping belt-braking system ensures a slow and safe retraction every time.
- Belt mechanism is easily replaced in the field using a screwdriver.
- Connects to most manufacturers' stanchions.
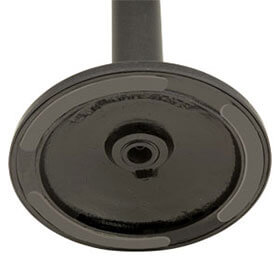
Superior Stanchion Base
- Weighted steel stanchion base for superior stability.
- Factory applied, rubber pads protect flooring and promote air flow, allowing wet floors to dry quickly without staining.
- Optional weather-resistant base for outdoor use. Call for details.
Premium Barrier Post
- The original 4-way connection remains the best, allowing a simultaneous connection of up to 4 belts or accessories.
- One-piece post construction provides superior strength.
- Post can receive all major manufacturers' belts.
Save on Shipping
- Ordering Beltrac Stanchions as Knockdown reduces shipping costs by packaging them for maximum efficiency — 2 to a box.
Best-in-Class Warranty
- 5 years on posts. 3 years on mechanism.
Installation Guides:
Beltrac Stanchion Assembly
-
STEP 1
Align stanchion grooves to match the grooves on the Rubber Insert, then lower the post onto the base assembly.
-
STEP 2
Before tightening bottom hex bolt, make sure post and base are perpendicular to one another and that there are no gaps between post and base.
-
STEP 3
Use the supplied Allen Wrench (5/16" drive) to tighten the center Hex Bolt. Tighten minimum of 5 turns with at least 20 ft–lbs of torque.
-
ATTENTION:
Over time, extensive handling of the stanchion may cause the rubber insert that holds the base to the post to loosen slightly. Should this happen, please use the Allen Wrench (5/16" Drive) to tighten the bottom hex bolt.
Belt End Replacement
BEFORE YOU START: Examine your new plastic Belt End carefully. It will arrive in two pieces. The Belt End Back piece has textured plastic that wraps around the back and a radius corner which should be oriented to the top. The Belt End Front piece has a dovetail shape that fits into the Beltrac post groove. The lip on the front piece should be oriented to the top.
IMPORTANT: The top edge of the Belt Ribbon and the top of the Belt End must be oriented “top-to-top” throughout assembly or the newly assembled Belt End will not work properly. "Mark" the top edge of the Belt Ribbon with a paperclip before knotting to ensure correct assembly.
-
STEP 1
Pull enough Belt Ribbon out from post to make a loose knot. This will keep it from retracting back into the unit and will make it easier to work with. Take note of the top edge of the Belt Ribbon and place a paper clip to mark the top.
-
STEP 2
Cut off the old Belt End and thread the Belt End Back piece onto the belt ribbon. Double-check that the radius corner and the belt ribbon are oriented to “TOP”. The radius corner should also be facing the unit.
-
STEP 3
Position Wedge in Crimping Tool so that the back edge sits against the screws. Feed the belt ribbon into the Wedge, making sure it is centered and fully seated to the back of the Wedge. Apply pressure with the Crimping Tool to secure.
-
STEP 4
Fold Ribbon/Wedge over and fit it snugly into the Belt End Back piece. Secure the Belt End Front piece to the Belt End Back piece using the 2 provided screws (there is only one way it will fit). Untie the knot and retract the belt to complete installation.
specifications:
 SPEC SHEET: Beltrac 3000 Retractable Belt Stanchions
- SPEC SHEET: Beltrac Replacement Mechanism
- SPEC SHEET: Beltrac Replacement Parts
- SPEC SHEET: Beltrac Finishes and Colors
- SPEC SHEET: Belt Sublimation Guidelines
 ASSEMBLY SHEET: Beltrac Stanchion Sloped Base - Knockdown
 - ASSEMBLY SHEET: Beltrac Stanchion - Pre-Assembled
- ASSEMBLY SHEET: Beltrac Stanchion with Slim Base
- INSTALLATION SHEET: Belt Mechanism Replacement
- INSTALLATION SHEET: Belt End Replacement
- INSTALLATION SHEET: Beltloc® Installation